Powered by Powerkit
You need to install and activate our free plugin Powerkit to make this feature work.
You may install Powerkit from the list of recommended plugins in Appearance → Install Plugins or from the common plugins page in Plugins → Install Plugins.
Easily add opt-in (subscription) forms to your website and grow your subscribers’ list with the Opt-In Forms module.
The Opt-In Form module now supports multiple subscription services including MailChimp, Kit.com, MailerLite, and Custom forms.
Selecting a Subscription Service
- Navigate to Settings → Opt-In Forms.
- Choose your preferred subscription service: MailChimp, Kit.com, MailerLite, or Custom.
- Configure the selected service using the corresponding settings section.
- Click Save changes.
MailChimp Integration
Obtain API Key
- Log in to your MailChimp account.
- Click your profile name to expand the Account Panel, and choose Account.
- Click the Extras drop-down menu and choose API keys.
- Copy an existing API key or click the Create A Key button.
- Name your key descriptively, so you know what application uses that key.
Configuration
- Input your API Key.
- Click Refresh Lists to load your audiences.
- Select a audience from the Default Audience select field.
- Optionally enable Double Opt-In and a Data Privacy Checkbox.
Kit.com Integration
Obtain API Key
- Log in to your Kit.com account.
- Click on your profile icon and go to Settings.
- Navigate to the Developer section.
- Copy the V3 Public API Key.
Configuration
- Input your API Key.
- Click Refresh Forms to load your forms.
- Select a form from the Default Form dropdown.
MailerLite Integration
Obtain API Key
- Log in to your MailerLite account.
- Go to Integrations → API from the main menu.
- Copy your API key or generate a new one if needed.
Configuration
- Input your API Key.
- Click Refresh Groups to load your groups.
- Select a group from the Default Group dropdown.
Custom Form Integration
Configuration
- Enter the Form Action URL where form submissions will be sent.
- Specify the Email Field Name (default: “email”).
- Specify the Name Field Name (default: “name”).
- Optionally add Hidden Fields in the format: field_name=value (one per line).
Common Settings
Data Privacy Checkbox
For any subscription service, you can configure a Data Privacy Checkbox Label that will appear with all subscription forms. Leave this blank to disable the checkbox.
Widget
This feature is available in themes that support widgets only.
You may display your Subscription Form widget in your sidebar by following these steps:
- Navigate to Appearance → Widgets.
- Drag the Subscription Form widget to the desired widget area.
- Choose your preferred Subscription Service.
- Configure other widget options and click Save.
Shortcode
You may also add an Opt-In Form in your post or page content by adding the following shortcode:
[powerkit_subscription_form title="Subscribe Title" text="Subscribe Message" list_id="default" bg_image_id="null" service="mailchimp"]Accepted Attributes
title
Title. Default is empty.
text
Subscribe Message. Default is empty.
bg_image_id
Background Image ID. Default is empty.
display_name
If set to true, will add the First Name field to the form. Default is false.
list_id
The ID for the selected service (List ID for MailChimp, Form ID for Kit.com, Group ID for MailerLite). Default is default.
service
The subscription service to use. Accepted values: mailchimp, kit, mailerlite, custom. Default is the service selected in Settings.
Gutenberg Block
You can also add an Opt-In Form using the Gutenberg block editor:
- Add the “Opt-In Form” block to your post or page.
- In the block settings sidebar, choose your preferred Subscription Service.
- Enter the List/Form/Group ID or leave empty to use the default from settings.
- Configure additional options as needed.
Signup Form URL (MailChimp-specific)
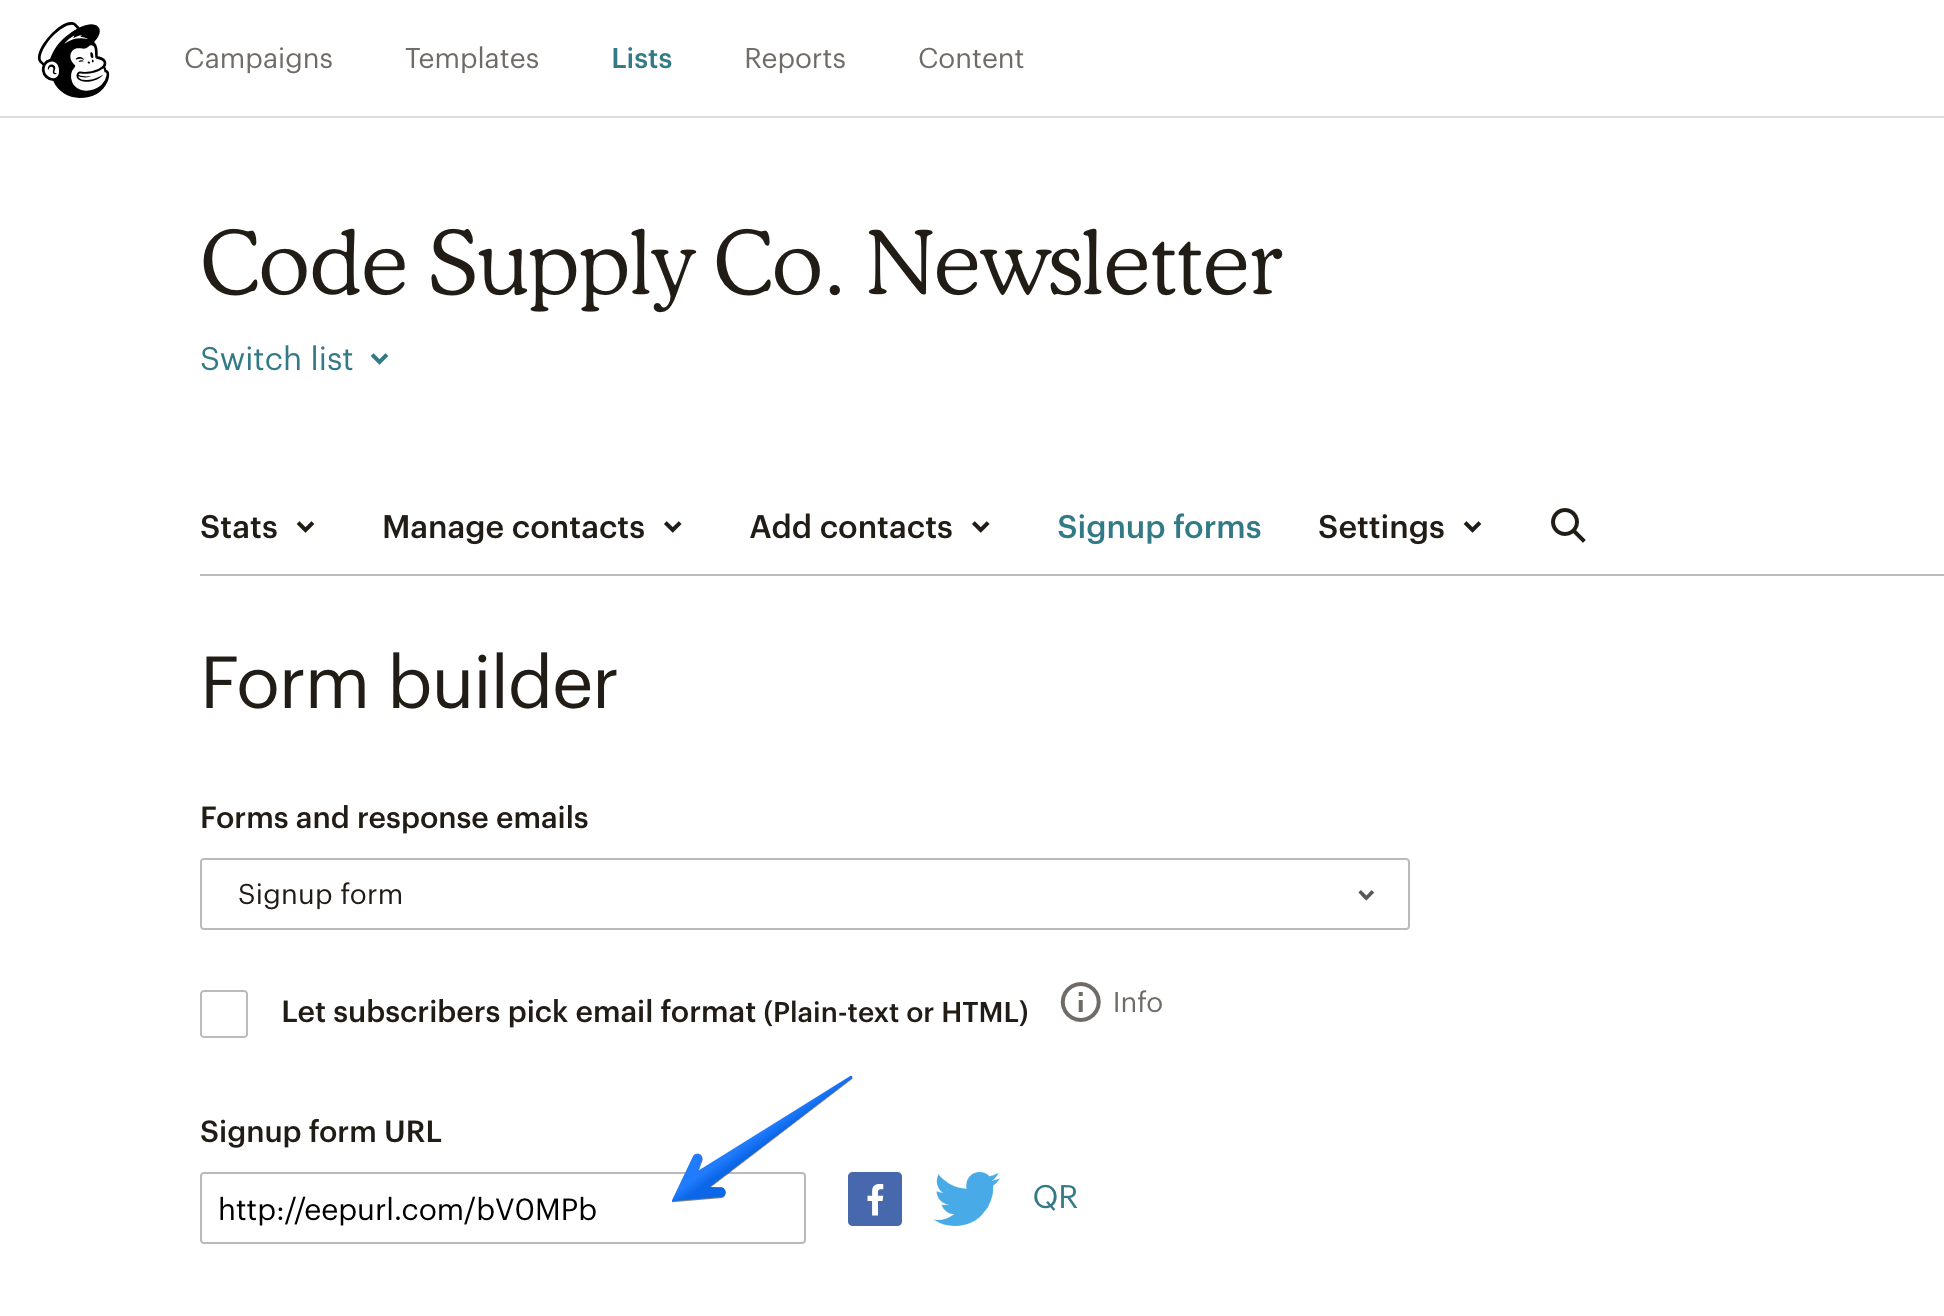
You may also insert a link to your MailChimp signup form in menu or a button. In order to find the Signup Form URL please navigate to the MailChimp dashboard, then go to your audience → Signup Forms → Form Builder → Signup Form URL.
See the screenshot for reference: