Create beautifully tiled galleries with the Justified Gallery module. Control the image height and padding between images per gallery or globally.
Both the Justified and Slider galleries are seamlessly integrated into the WordPress UI. To create a Justified Gallery follow the same steps as you would as if inserting a default WordPress gallery:
- Navigate to the post edit screen and click on the Add Media button above the WordPress post editor.
- Click on Create Gallery.
- Select the images to include in your gallery and click on the Create new gallery button.
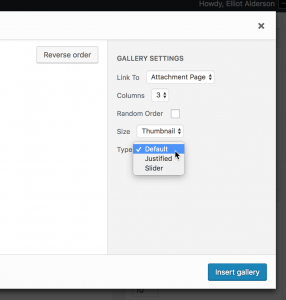
Then in the Gallery Settings tab select Justified from the Type select field:

Important
Make sure, you selected an image size that’s not being cropped, as otherwise all images will be of the same size and there won’t be anything to justify.
Justified Galleries will look nice, only if you combine both landscape and portrait images.
Settings
To configure global Justified Gallery settings, please navigate to Settings → Media → Justified Gallery.
WordPress 5.x.x Compatibility
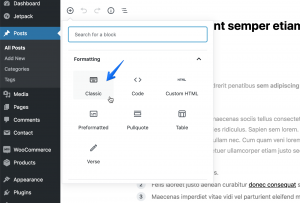
Currently Justified Galleries are supported within the Classic block only. To create a Justify Gallery first insert a Classic block:

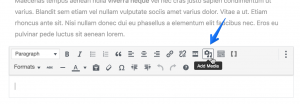
Then click the Add Media button in the Classic block toolbar and proceed according to the instructions above:

Shortcode
[gallery type="justified" ids="10,20,30" pk-jg-margins="10" pk-jg-row-height="160" pk-jg-max-row-height="-1"]Accepted Attributes
type (Required)
Type. Required justified.
ids
IDs of attachments. Default is none.
pk-jg-margins
Space between images. Default is 10.
pk-jg-row-height
Row height. Default is 160.
pk-jg-max-row-height
Max row height. Type -1 to remove the limit of the maximum row height. Default is -1.